Fronius FTP
Configure FTP push through WiFi connection
Via WiFi it is possible to configure the FTP push directly via the inverters. To achieve this, the following steps must be taken:
- Turn on WiFi hotspot and log in
- Surf to the web interface
- Configure FTP push as in FTP
Turning on WiFi hotspot and logging in
Determine which inverter is connected to the network or to the mobile router. If current production data is visible, press the return button.
Then go to the "Setup" menu and scroll to "Wifi Access Point". Activate the WiFi Access Point, the display shows the network name and password of the WiFi network of the inverter.
To log in to the inverter, search for the WiFi network, preferably using a laptop. See the network name on the display to select the correct one. Enter the password that is visible on the display, default is "12345678". When a connection has been made, a connection to the web interface can be made.
Surf through the webinterface
Inverter data can be consulted via the web interface. In this system, all crucial data can be retrieved from the inverters in real time. You also use this web interface for various configurations such as FTP push.
Surf to http://192.168.250.181 for the web interface.
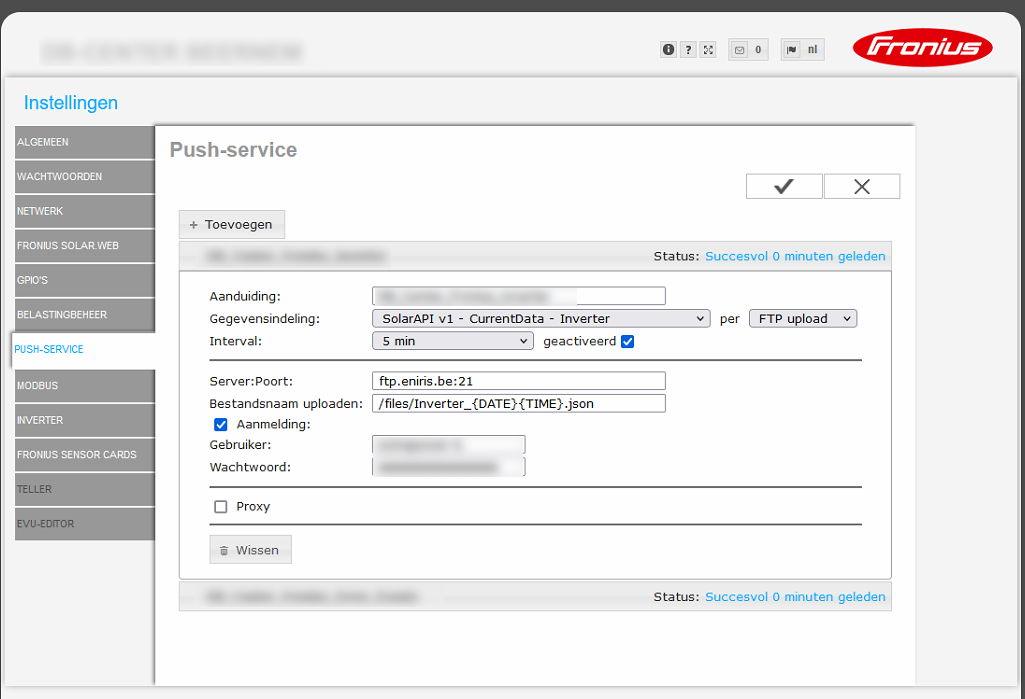
Now you can configure the system as shown in the FTP section above.
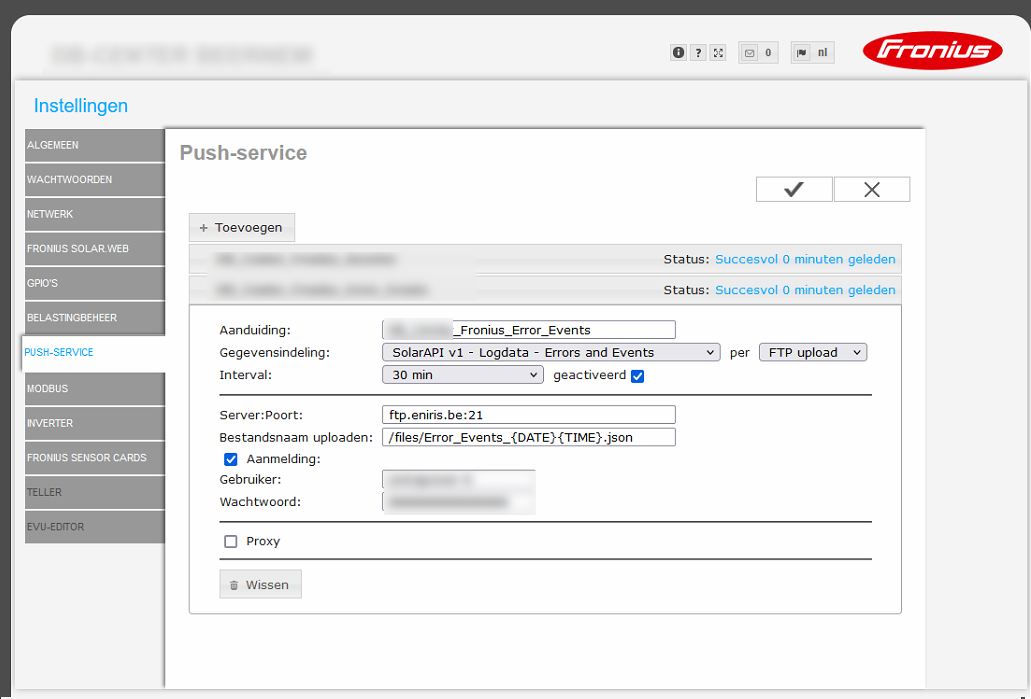
Please pay attention to push to the /files/ folder
1. Pushing data
2. Pushing errors & events
Note: port 21 must not be blocked within the network.